HOW TO: Create a Searchable SharePoint 2010 BDC .NET Assembly Connector Which Reads From A Flat File
November 5, 2009
Which SharePoint 2010 Site Template Is Right For Me?
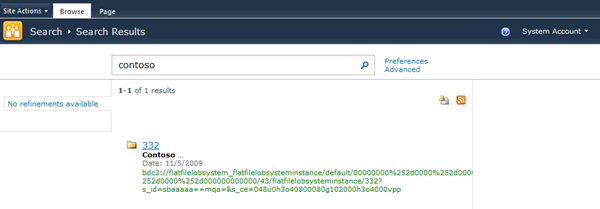
November 20, 2009In part 1of this blog post series I showed you how to create a .NET Assembly Connector to read data from a flat file. This blog post shows you how to register an external content type associated with a .NET Assembly Connector with the SharePoint search search service so you can index and search the data coming from the external content type.
The Business Context
As I mentioned in part 1 of this blog post series, it’s commonplace to find critical business data stored inside flat files in large, mature organizations. In addition to being able to browse the data inside web pages, your end users typically want to search for data in the flat file data sources.
The Solution
The SharePoint search service provides the ability to index and search external content types. You may be surprised to see how easy it is to set up the search service to index and search external content sources. This process is very easy to do, in fact it’s really not that much different than it was in the last version of SharePoint. The key methods and properties which allow you to index and search data from an external type are covered in part 1. After you have an external content type registered with the SharePoint 2010 Business Data Connectivity (BDC) service follow these steps to index and search the data.
Create A Content Source
This series of steps builds upon the external content type created in part 1of this blog post series.
- Log into your SharePoint Server with credentials that have the permission to administer the SharePoint search service
- Click Start, All Programs, Microsoft SharePoint 2010 Products, SharePoint 2010 Central Administration
- Click Manage Service Applications
- Click the link corresponding to your Search Service Application
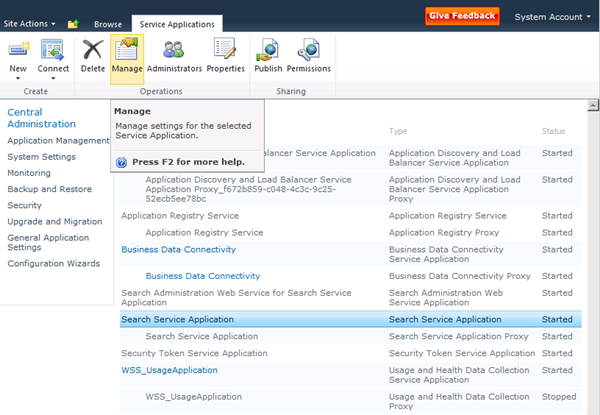
- In the ribbon, click Manage (see screenshot below)
- When the page refreshes, click Content Sources
- When the page refreshes, click New Content Source
- In the name textbox enter Flat File Data
- Select the Line of Business Data Content Source Type radio button
- When the page refreshes, select the Business Data Connectivity service running on your server in the Business Data Catalog Service Application dropdown list
- Select the Crawl selected external data source radio button
- Check the checkbox next to the FlatFileLOBSystemInstance external data source
- Check the Start full crawl of this content source checkbox
- Click OK

- When the page refreshes, click the Refresh link until the Status for the Flat File Data Content Source says Idle

Create A Search Scope
After creating the content source, create a new search scope to make the content source searchable.
- Log into your SharePoint Server with credentials that have the permission to administer the SharePoint search service
- Click Start, All Programs, Microsoft SharePoint 2010 Products, SharePoint 2010 Central Administration
- Click Manage Service Applications
- Click the link corresponding to your Search Service Application
- In the ribbon, click Manage

- When the page refreshes, click Scopes
- When the page refreshes, click New Scope
- In the Title textbox enter Flat File Data Source
- Click OK
- When the page refreshes, click the Add rules link next to the Flat File Data Source search scope

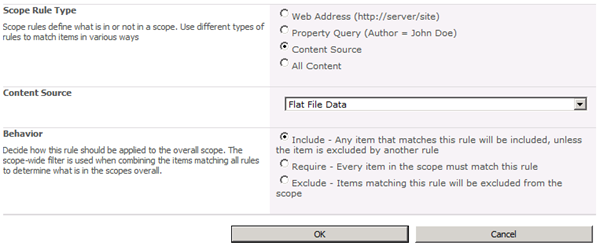
- In the Scope Rule Type section, select the Content Source radio button
- In the Content Source dropdown select Flat File Data
- In the Behavior section select the Include – Any item that matches this rule will be included, unless the item is excluded by another rule radio button
- Click OK
- When the page refreshes, click Search Administration
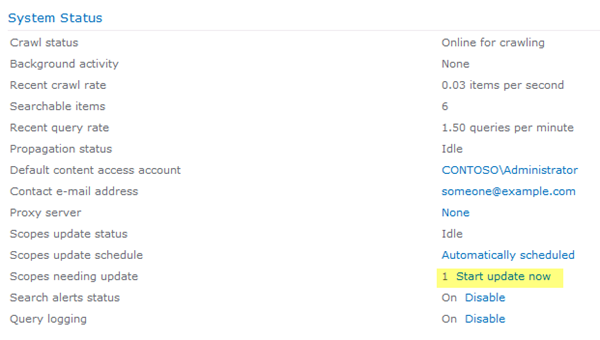
- When the page refreshes, click Start update now
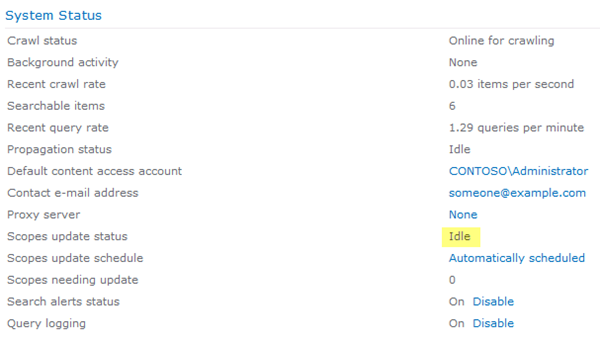
- Refresh the page until the scope update process completes
Create A Search Center Site
This example assumes a search center site must be created on your SharePoint server. If you already have one created you can skip to the next series of steps to configure the search scopes dropdown list
- Open your SharePoint web site in a web browser
- Click Site Actions
- Select New Site
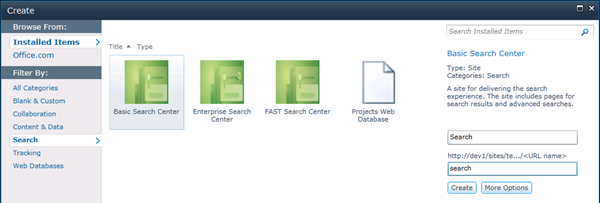
- Click the Search tab
Note: The Search tab may or may not be available, depending on the template your SharePoint site is based upon. In this example my SharePoint site is a team site, which supports the creation of Search Center sub sites.
- Select the Basic Search Center template
- In the Name textbox enter Search
- In the URL textbox enter search
- Click Create
Configure the search scopes dropdown list
- After the Basic Search Center site is created click Site Actions
- Select Site Settings
- Click Go to top level site settings
- Click Search scopes
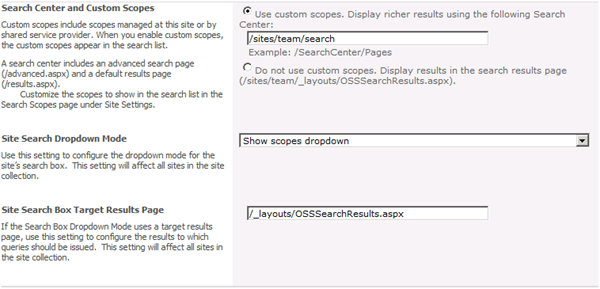
- Select the Use custom scope radio button
- Enter the path to your Basic Search Center sub site
Note: In my example the search center site is a sub site two levels deep, under the sites URL. That’s why you see /sites/team/search in the screenshot below.
- Select the Show scopes dropdown option in the Site Search Dropdown Mode dropdown list
- Click OK
- Click Search scopes
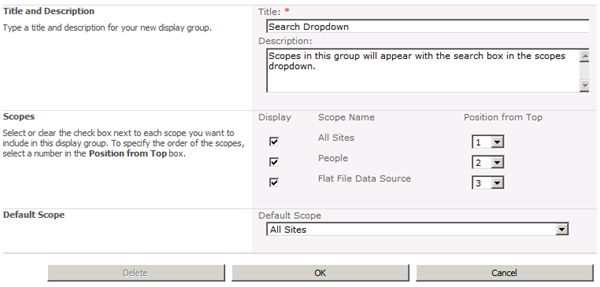
- Click Display Groups
- Click Search Dropdown
- Check the Flat File Data Source Scope Name
- Click OK


