HOW TO: Use Transparent Rectangles Effectively In a PowerApp
November 20, 2017
HOW TO: Create Shortcuts To PowerApps On Mobile Devices
January 16, 2018
[ Updated September 12, 2018 – Changed instructions to create an app registration made through the Azure portal and updated the screens to make the custom connector to match product revisions. ]
This post describes how to create a custom connector (API connector) to call the Microsoft Graph API from PowerApps and Flows. This process is especially helpful to know when you would like to use the MS Graph API from a PowerApp and/or Flow and there is no connector available for the MS Graph API you wish to invoke.
Register an application and specify permissions
The first step is registering an application in the Microsoft Azure Portal.
1. Sign into the https://portal.azure.com with an account that has permissions to make Azure Active Directory applications.
2. In the menu on the left, click Azure Active Directory
3. Click App registrations
4. Click New application registration
5. Enter a Name
Note: Throughout this example, the name IgniteCustomConnector is used.
6. In Application type, select Web app / API
7. In Sign-on URL enter
https://msmanaged-na.consent.azure-apim.net/redirect
8. Copy the Application ID value
9. Open Notepad or another text editor
10. Paste the Application ID in the text file
11. Save the text file
12. Click Settings
13. Click Keys
14. In the Passwords section enter a key Description
15. Select a value in the Expires drop down list
16. Click Save
17. Copy the key value
18. Open Notepad or another text editor
19. Paste the key value in the text file
20. Save the text file
21. Click Required permissions
22. Click Add
23. Click Select an API
24. Select Microsoft Graph
25. Click Select
The next step is granting the delegated permissions your application needs to interact with the MS Graph API.
In this example we need the Read directory data (Directory.Read.All) and the Read all groups (Group.Read.All) delegated permissions.
26. In the DELEGATED PERMISSIONS section, select the check boxes next to Read directory data and Read all groups.
27. Click Select
28. Click Done
Note: When developing your own apps, make sure you add the permissions your application needs to perform other operations with the MS Graph API.
Generate Swagger File
The API you use in the custom connector is described in JSON format.
1. Open Postman
2. Click Collections
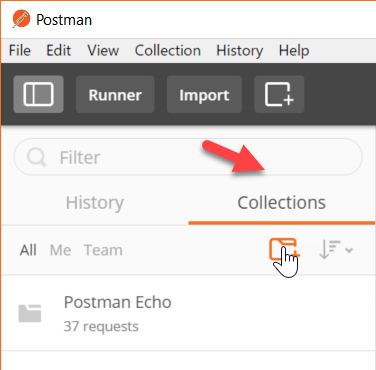
3. Click the new collection button
4. In the Name textbox, enter a name for the collection
Note: In this example, the name IgniteDemo is used.
5. Click Create
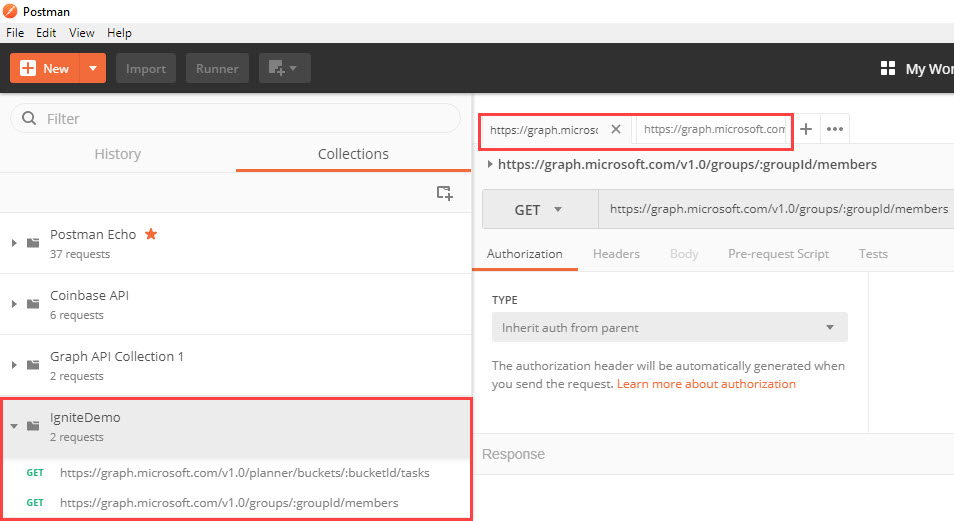
The collection bundles all of the Graph API calls we wish to make available in the custom connector.
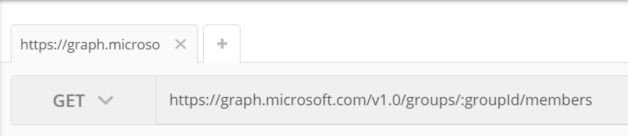
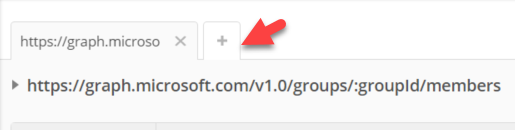
6. In the Get textbox, enter the URL of the Graph API you wish to invoke
In this example, we are calling two different Graph APIs so we enter each URL one at a time and save it to the collection.
Return the members of an AAD Group:
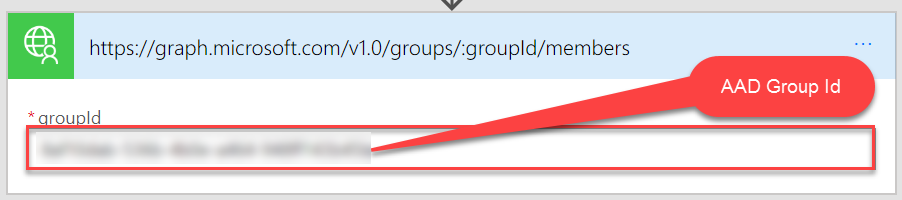
https://graph.microsoft.com/v1.0/groups/:groupId/members
Return the tasks in a bucket in a Microsoft Planner plan
https://graph.microsoft.com/v1.0/planner/buckets/:bucketId/tasks
Notice the path parameter is in the ‘:groupId’ format
7. Click the Save button

8. In the Save to existing collection / folder dropdown list, select the collection you created
9. Click Save
10. To add another MS Graph API call, click the + button, then repeat the steps to add the URL and save it to the collection
Here you can see both of the example MS Graph API calls we are making in Postman.
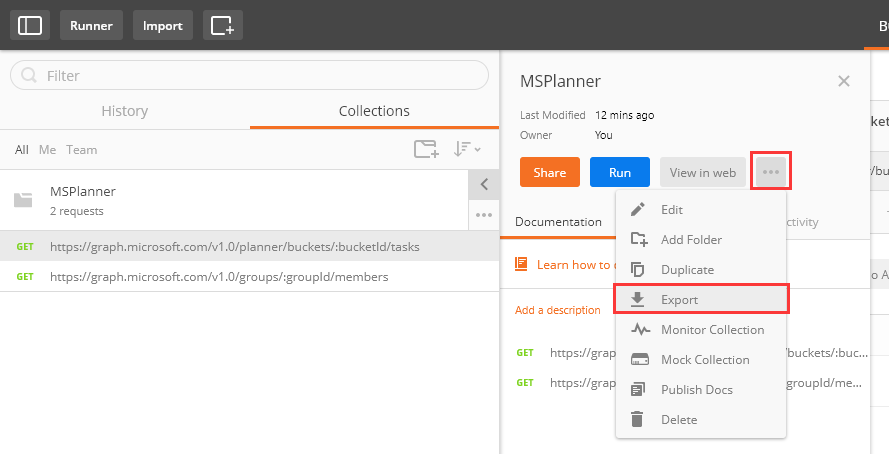
11. Click the ellipses button for the collection you created and select Export
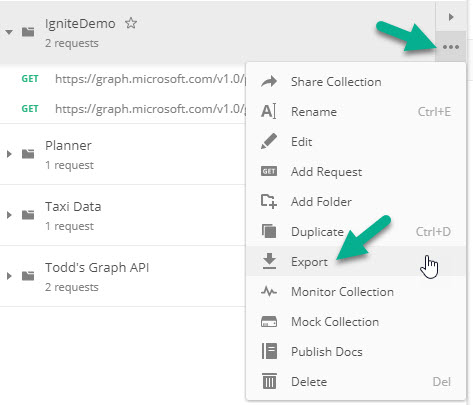
12. Select the Collection V1 radio button
13. Click Export
14. Select a folder on your computer
15. Click Save
Create custom connector
1. In a web browser, open the PowerApps web app in Office 365
https://web.powerapps.com
2. Click Data, then click Custom Connectors
3. Click Manage custom connectors
4. Click the + Create custom connector button
5. Select Import a Postman collection
6. Click the folder button
7. Select the JSON file you exported from Postman
8. Click Open
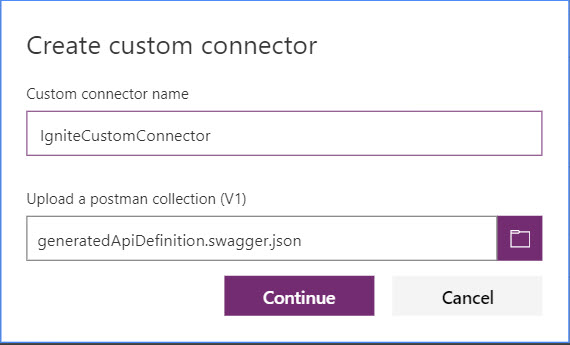
9. Enter the custom connector name
Note: In this example, the name IgniteCustomConnector is used.
10. Click Continue
11. Click Security
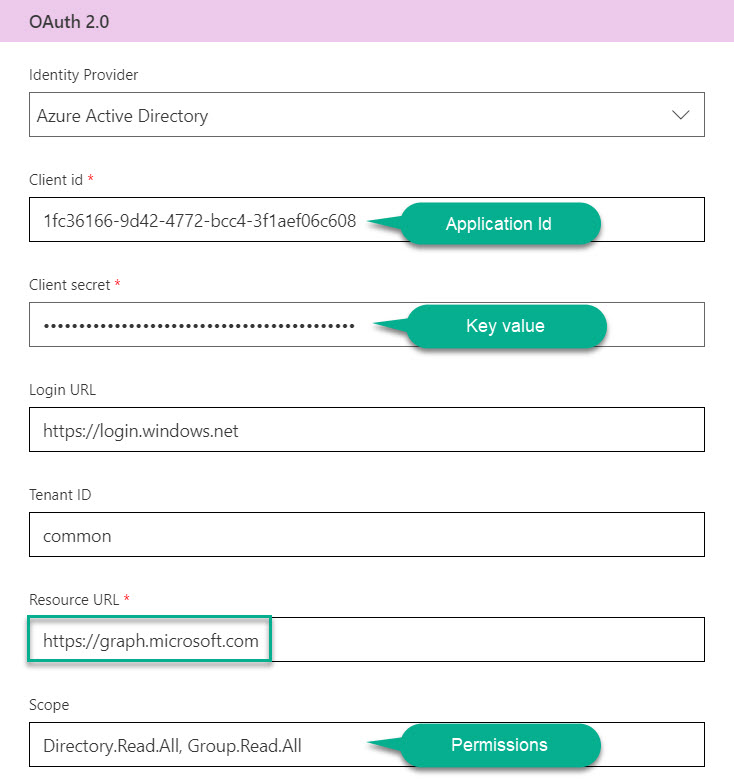
12. In the Choose what authentication is implemented by your API dropdown list, select OAuth 2.0
13. In the OAuth 2.0 section, in the Identity Provider dropdown list, select Azure Active Directory (Outlook works too)
14. In the Client id text box, enter the Application Id you saved to Notepad
15. In the Client Secret text box, enter the Key value you saved to Notepad
16. In the Scope text box, enter the permissions you configured when you made the application (Directory.Read.All, Group.Read.All)
17. In the Resource URL text box, enter https://graph.microsoft.com
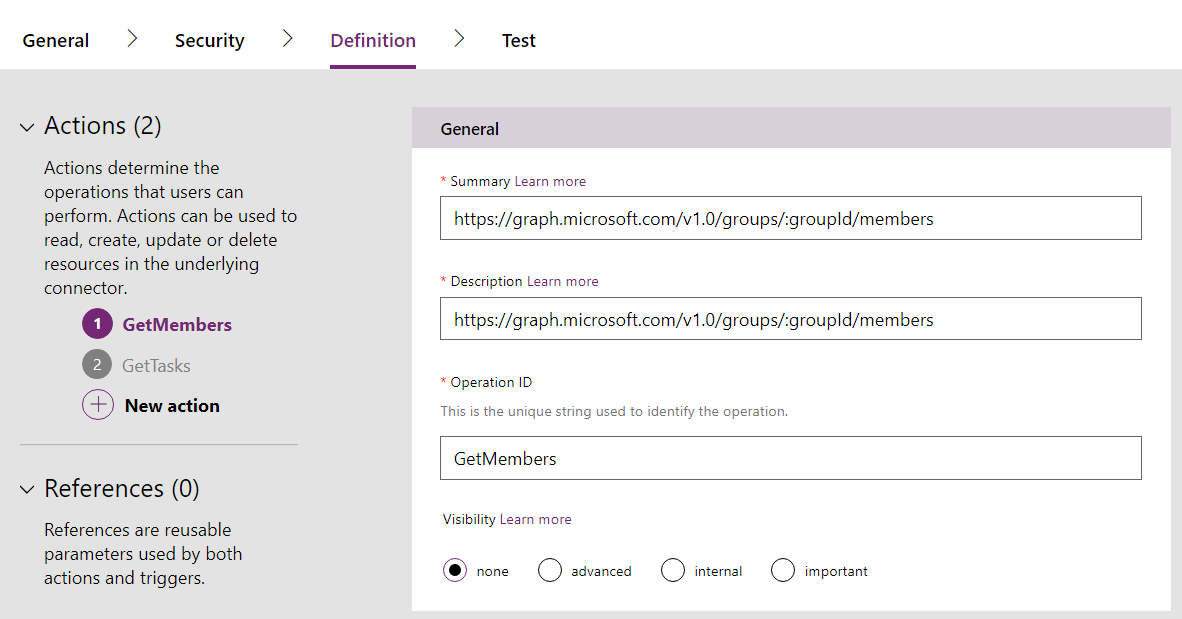
18. Click Definition
14. Change the Operation Id to a valid name format. In this case, we use GetMembers and GetTasks
15. Click Create connector
16. Click the Test tab
17. Click New connection
18. Click Create
19. Sign in to your Office 365 account
Note: the account you use must be an admin account
20. Click Accept
Note: if you get this error in this step, please check the redirect URL of the application is configured right.

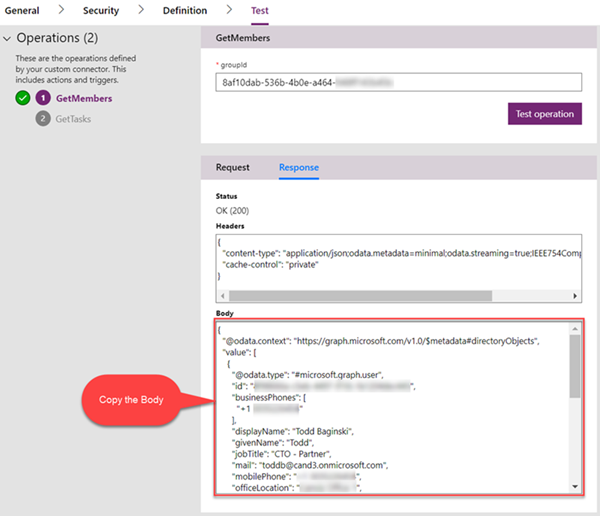
21. After the connection is added, navigate to the Test step again
22. Select the connection you just created
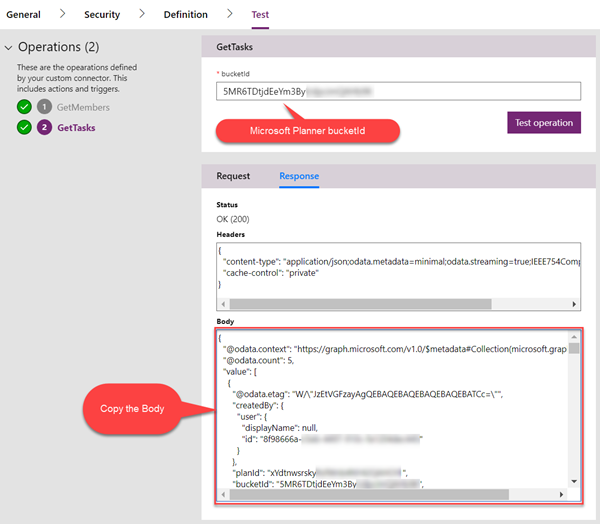
23. Test each operation you created, then copy the Response Body and save each Response body to a separate text file
For more information about the parameters, see this document.
https://developer.microsoft.com/en-us/graph/docs/concepts/overview
Testing the GetMembers operation
Note: Make sure the result is not empty.
Testing the GetTasks operation
Note: Make sure the result is not empty.
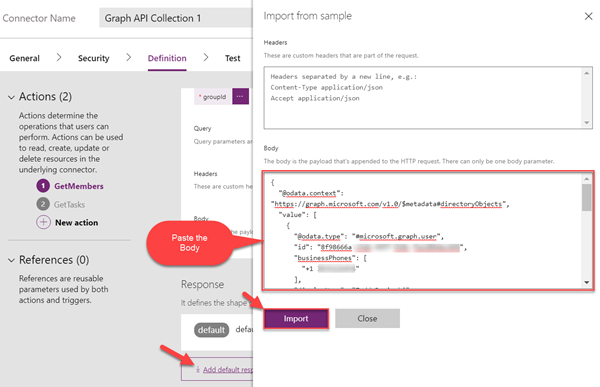
24. In Definition tab, scroll to Response section
25. Click Add default response, then paste in the corresponding Response Body you saved in the text files into the Body textbox. Do this for both of the actions.
26. Click Import
27. Click Update Connector
The Custom Connector for Microsoft Graph is now ready to use!
Add the custom connector to a PowerApp and test
These steps describe how to configure a connection with custom connector in a PowerApp. This PowerApp will list the members of an AAD Group.
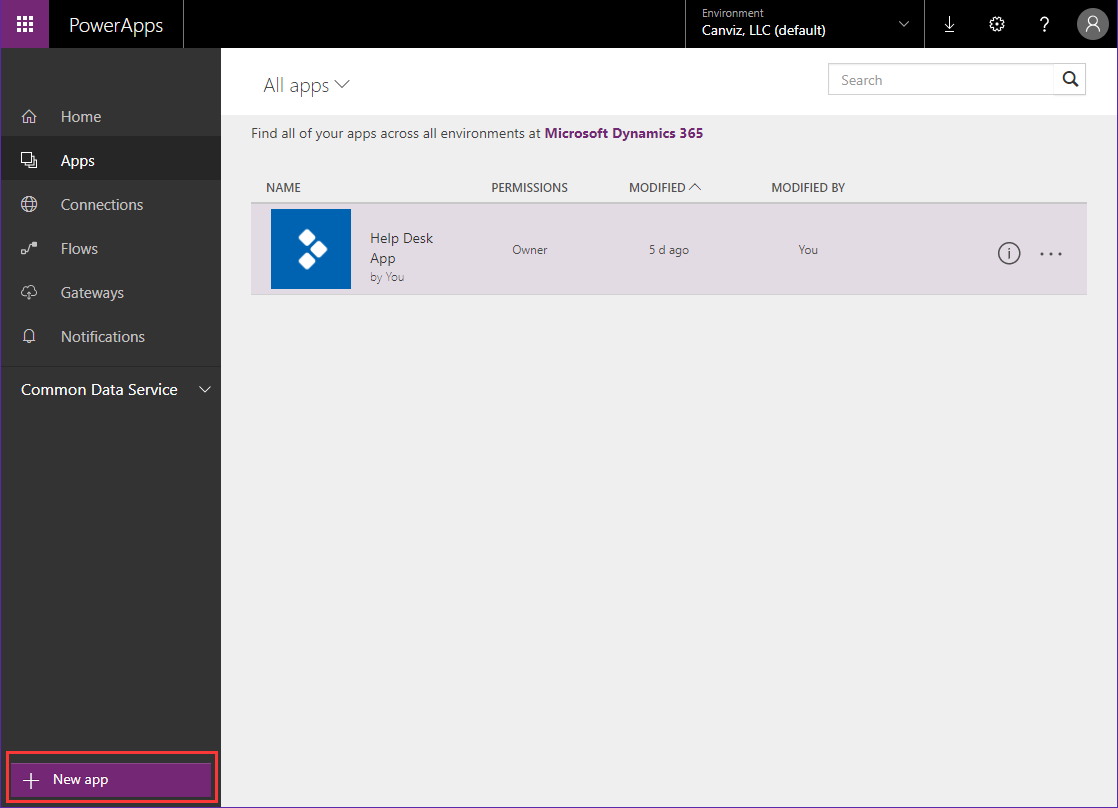
1. Create a new PowerApp by clicking the New app button
2. Select the Blank app with Phone layout

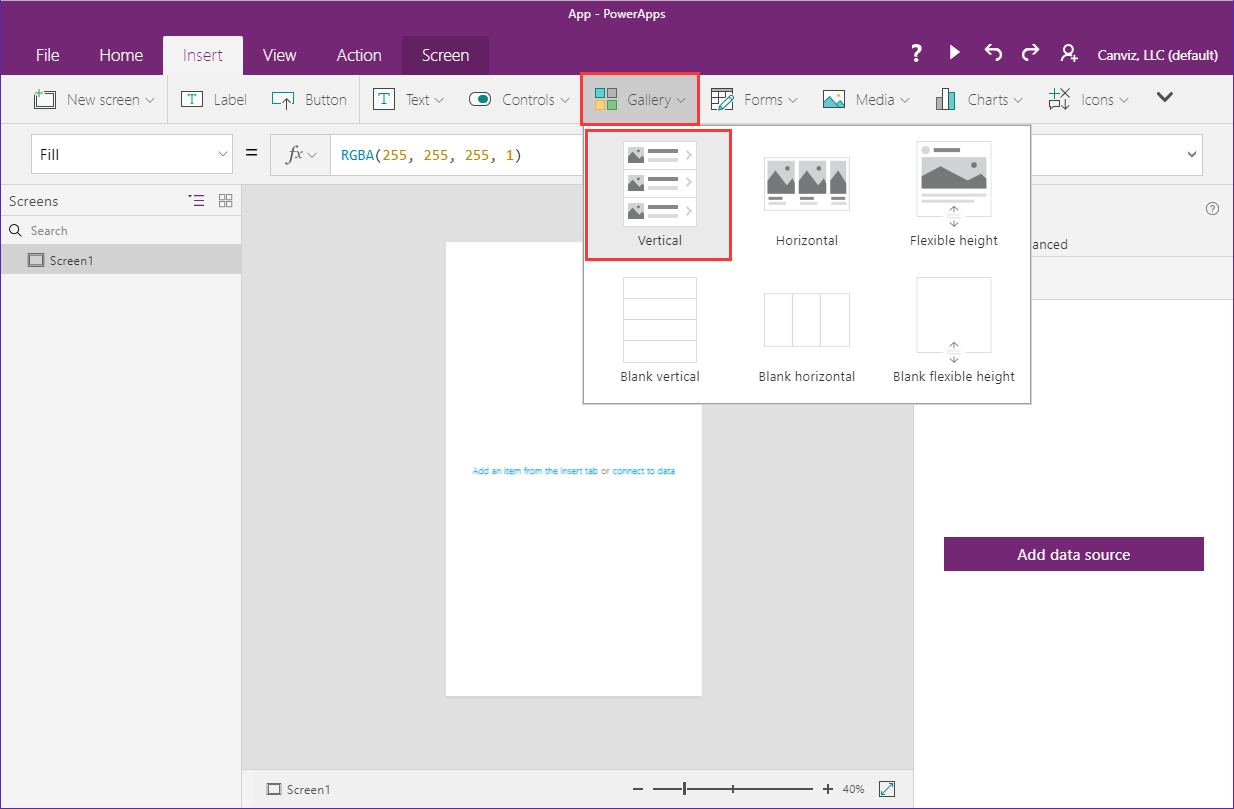
3. Select Insert on top navbar
4. Click Gallery
5. Select Vertical to add a gallery control
6. Select the gallery control
7. Click the dropdown arrow in the Gallery1 options
8. Click the Add a data source button
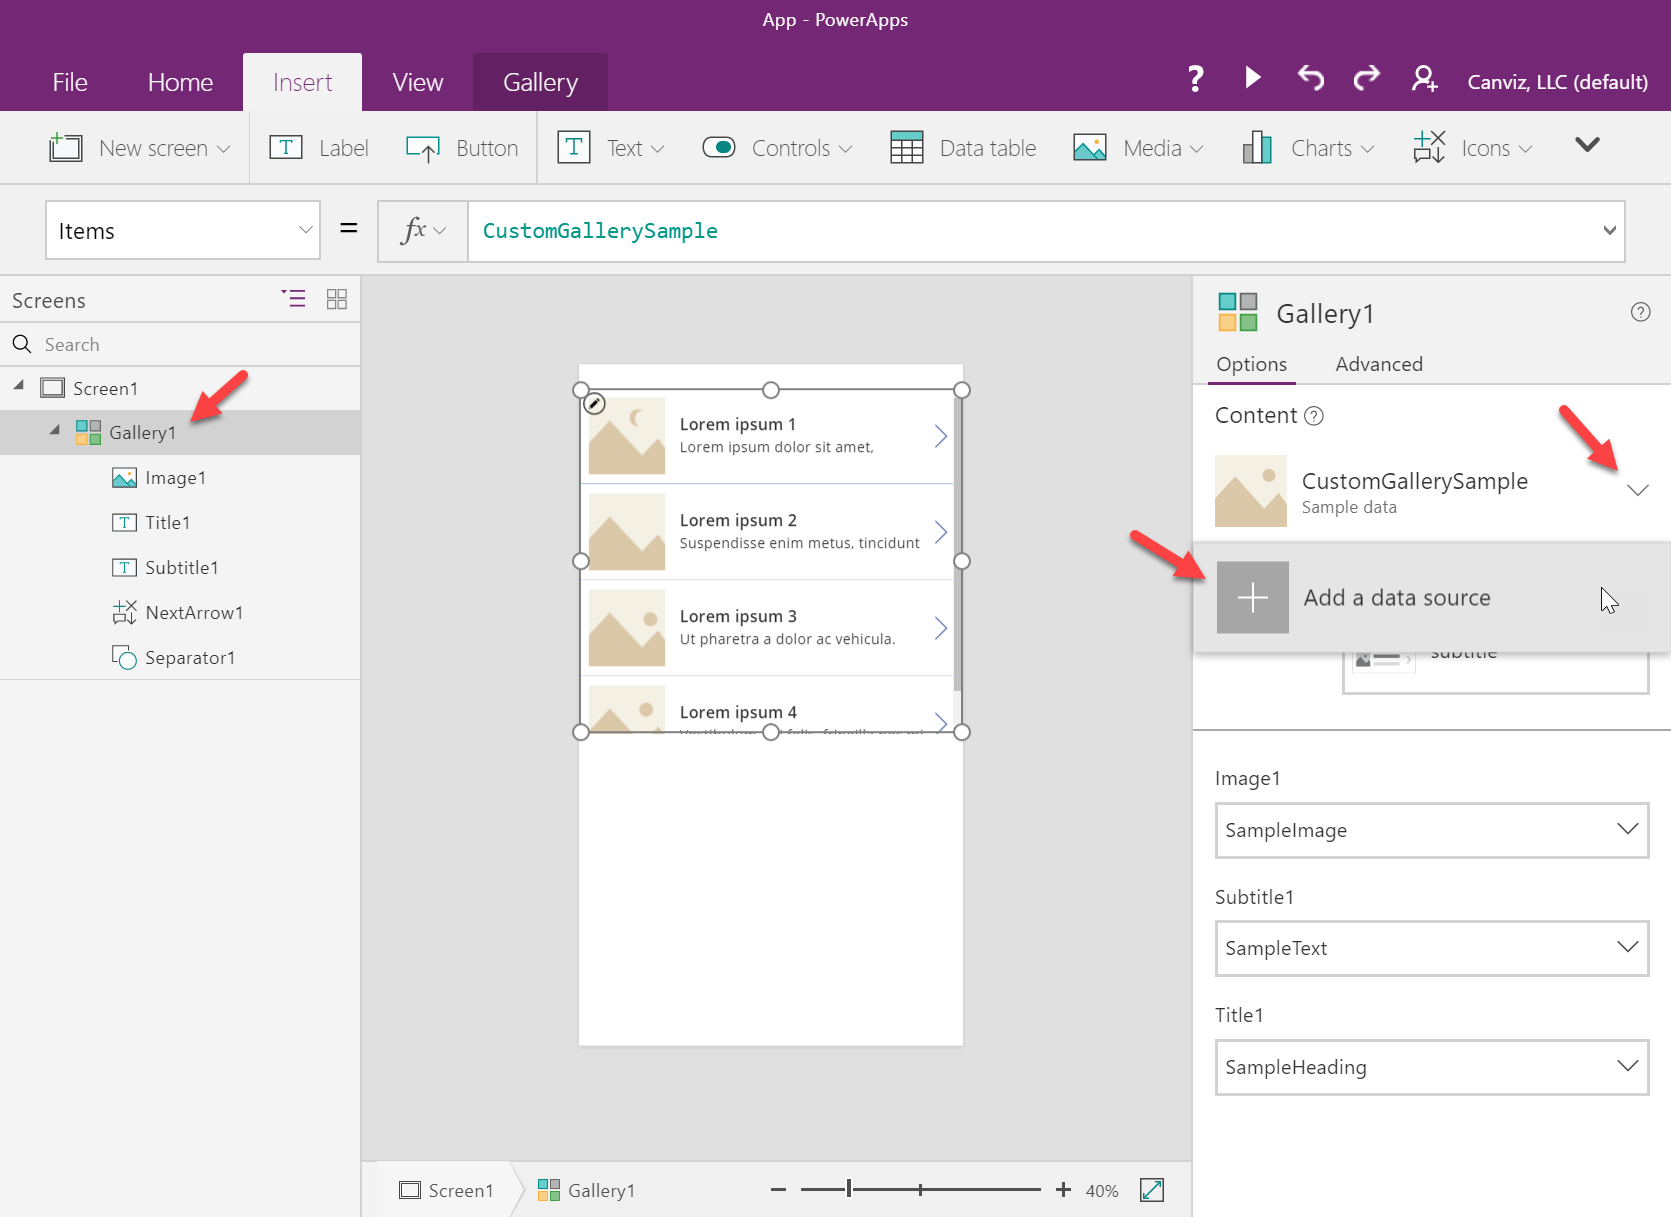
9. Select the connection for the custom connector
10. Modify the Items attribute of the gallery to use <CONNECTOR NAME>.GetMembers(“GROUP ID”).value
11. Replace the <CONNECTOR NAME> with the name of the data connection
12. Replace the GROUP ID with your own AAD Group Id
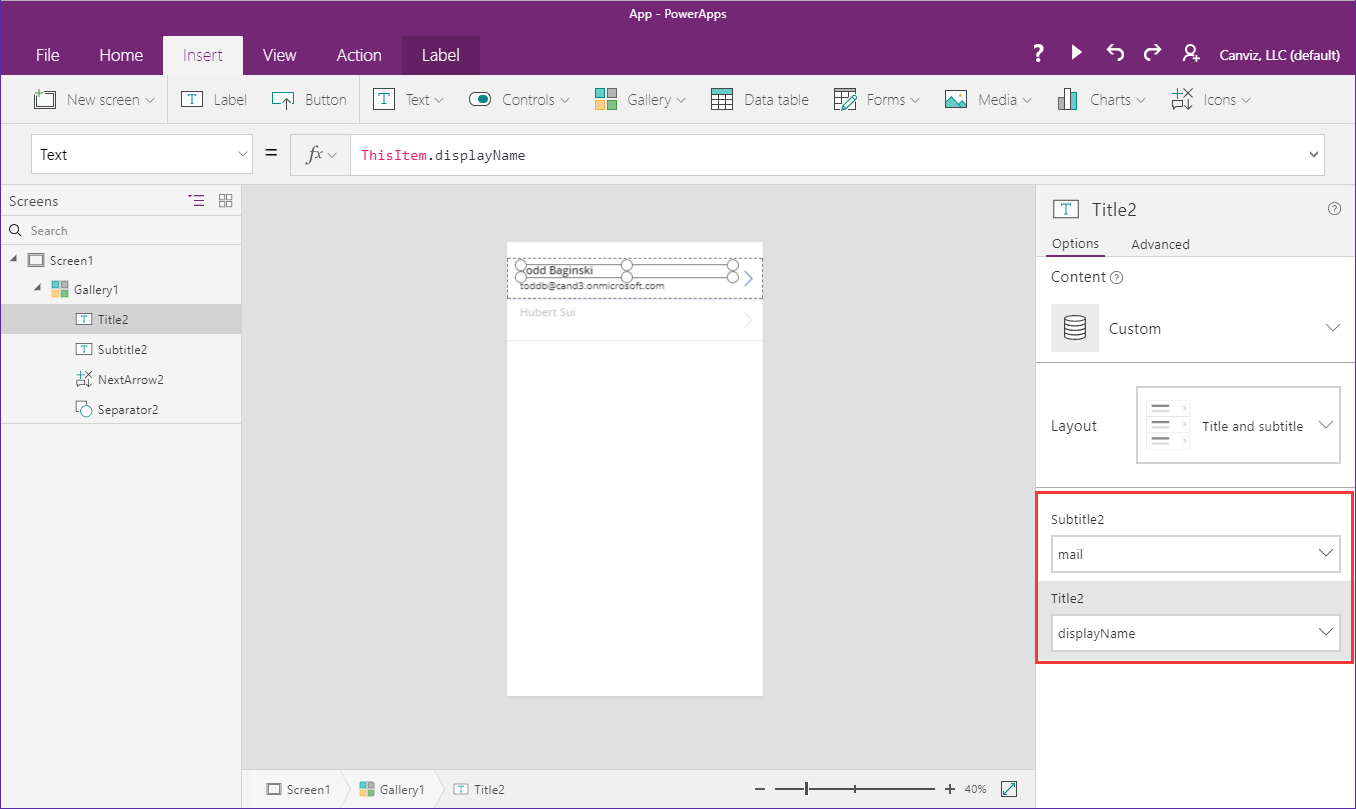
13. Change the layout of the gallery to Title and subtitle, then select mail in Subtitle2 and select displayName in Title2
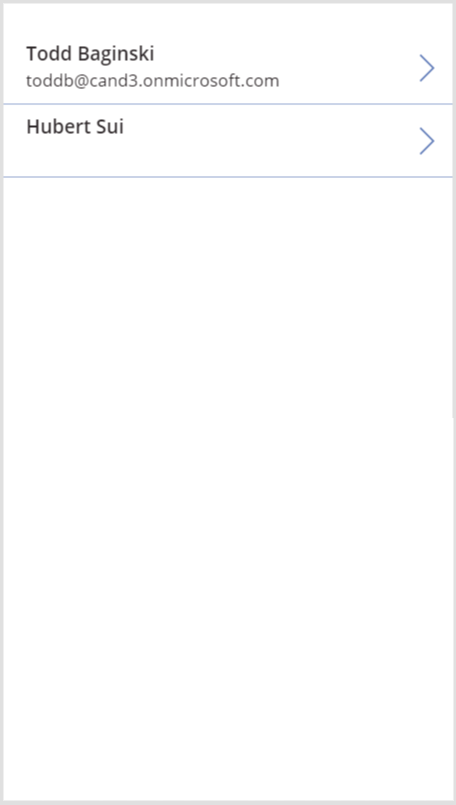
14. Click Run on top navbar, the list of users is shown in the gallery
Add the custom connector to a Flow and test
These steps describe how to configure a connection with a custom connector in a Flow. This Flow will list the members of an AAD Group.
1. Navigate to https://flow.microsoft.com
2. Click My flows
3. Click Create from Blank
4. Click Create from Blank again
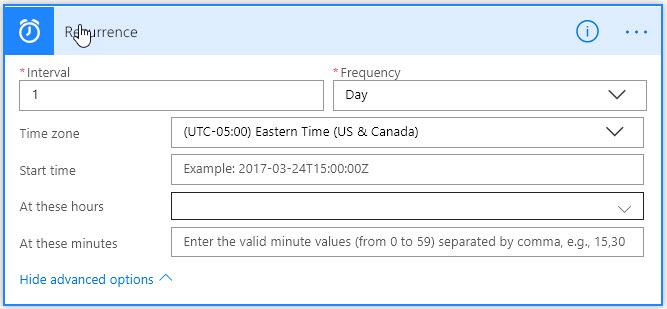
5. Create a Schedule – Recurrence trigger, and configure it like this
6. Click New Step
7. Click Add an action
8. In the search textbox enter Ignite
9. Click IgniteCustomConnector – Get Members
9. In the groupId textbox enter your own AAD GroupId
10. Click the ellipses for the action that returns the group members
11. Click Rename
12. Enter Get Members
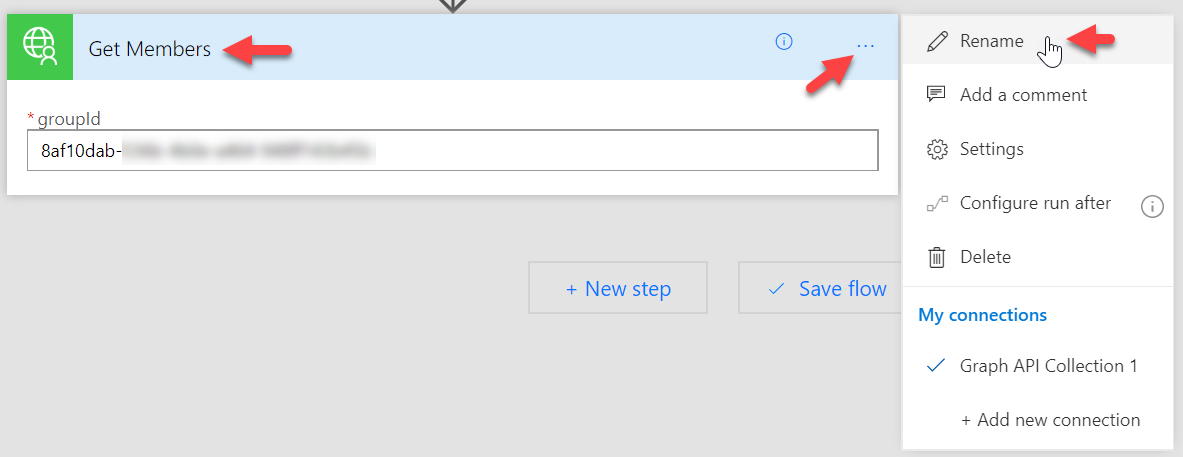
13. In the Flow name enter Test Graph API
14. Click Save
15. Click the back arrow
16. Click More > Run now in the Flow detail page

17. Click Run flow in popup window
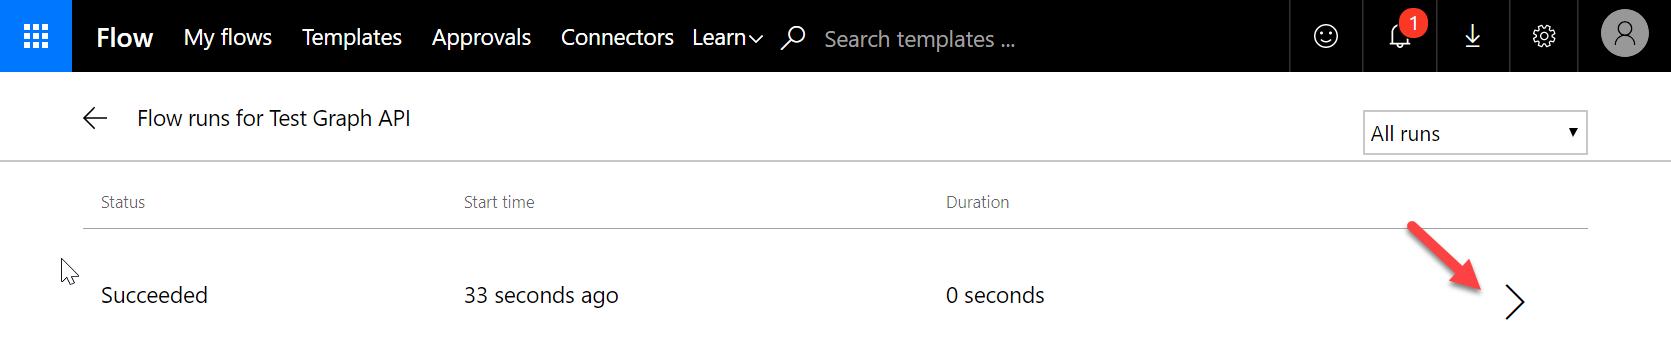
18. Click See flow run activity
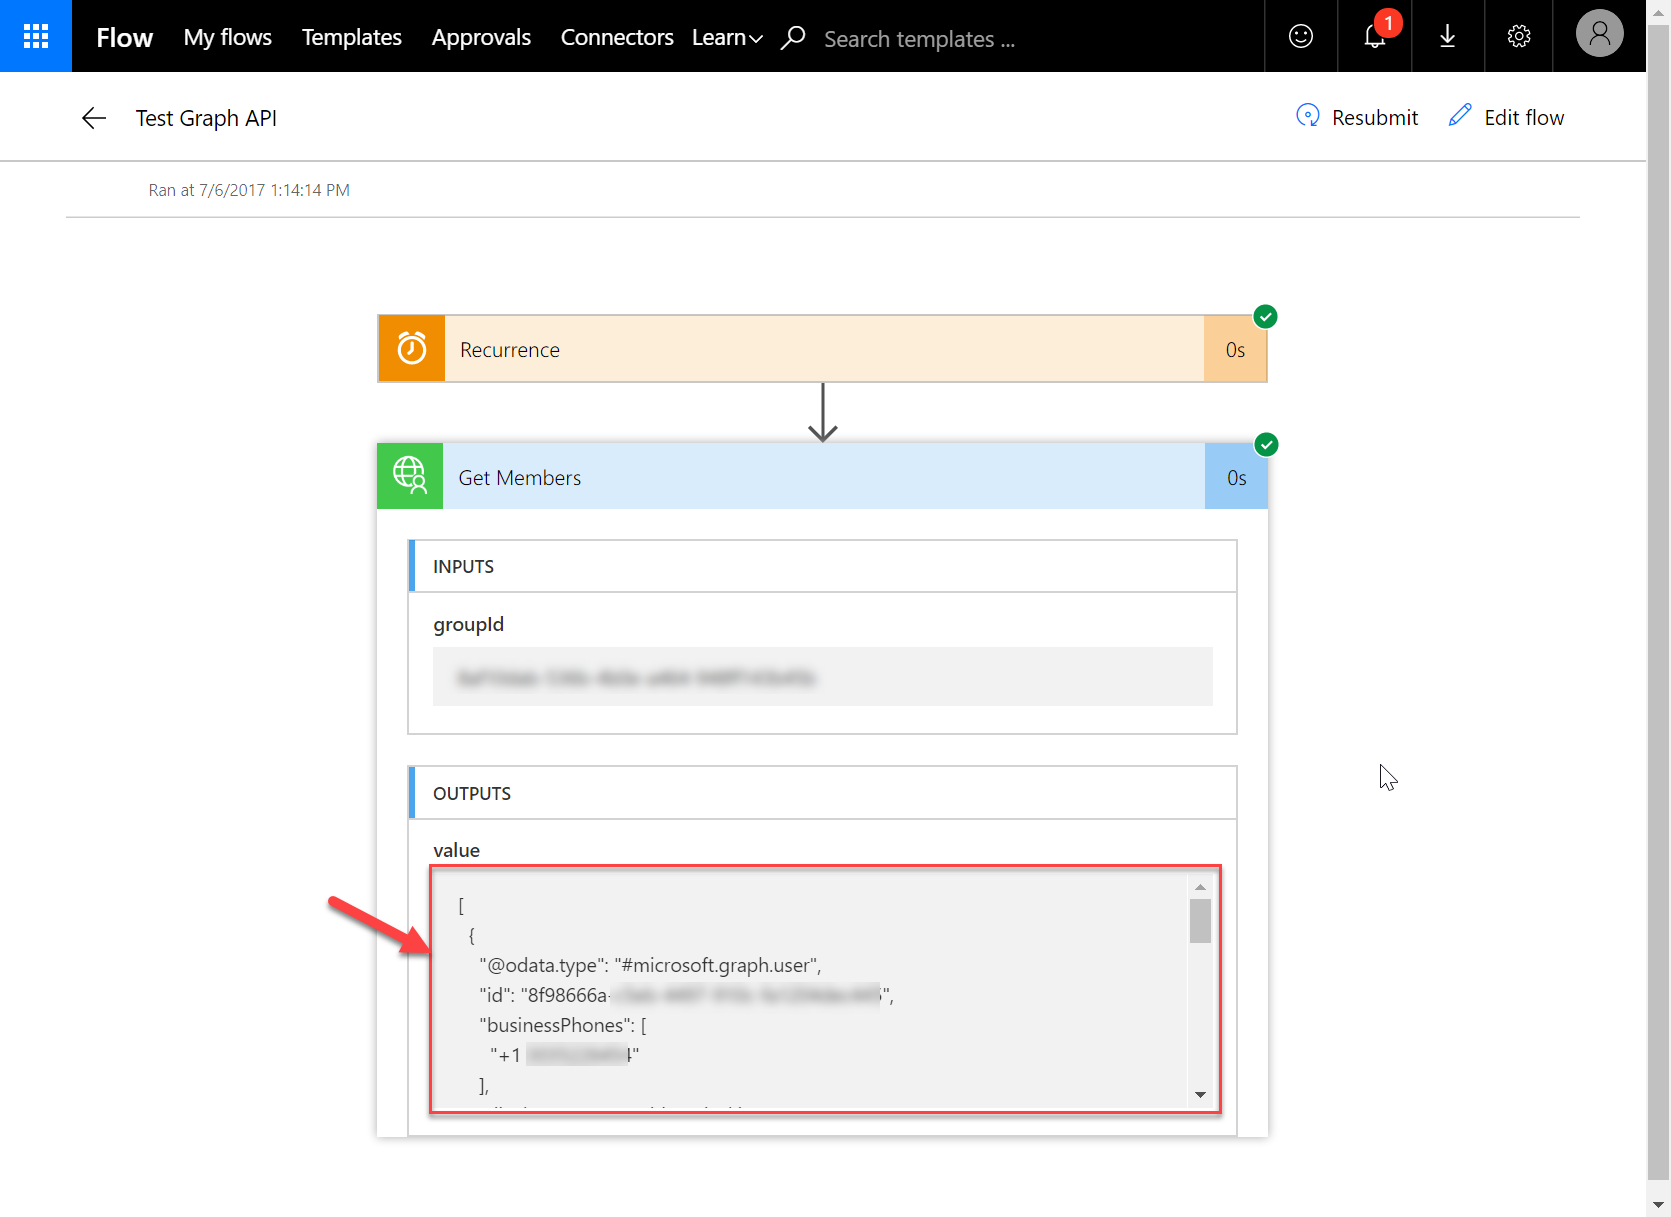
19. Click the last entry in the Flow run log
20. Click the Get Members action to expand it
21. Scroll through the output of the GetMembers action to see the AAD Group members