Automating Windows 7 Boot Entry Creation With PowerShell
June 10, 2010Speaking at SharePoint Saturday Denver
July 22, 2010Last week Mike Morton and the folks on the Visual Studio team released the Visual Studio 2010 SharePoint Power Tools. The Visual Studio 2010 SharePoint Power Toolsextend the SharePoint 2010 project templates and provide the following enhancements.
- A sandbox-compatible Visual Web Part item template.
- Compile-time validation to ensure your code will run the the sandbox.
This short HOW TO walks you through these features and demonstrates how to make a sandbox compatible Visual Web Part with the Visual Studio 2010 SharePoint Power Tools.
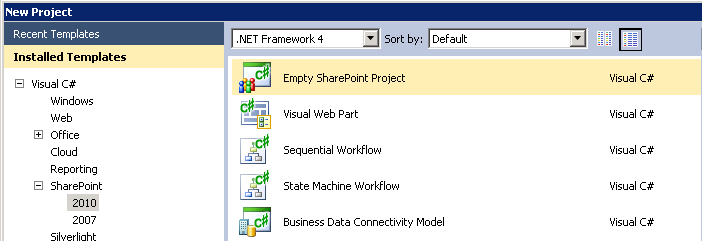
To begin, go download the Visual Studio 2010 SharePoint Power Tools and install them on your SharePoint development machine. Make sure you have Visual Studio 2010 installed first. Next, open Visual Studio 2010 and create an Empty SharePoint project.
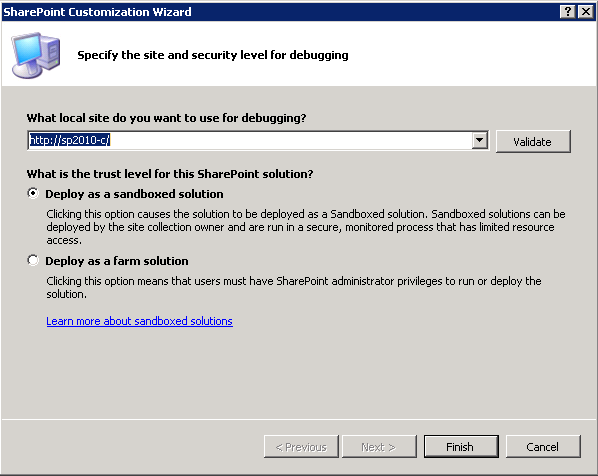
When the SharePoint Customization Wizard prompts you, select Deploy as a sandboxed solution.
After the project is created, right click the project node and select Add, then select New Item.
In the Add New Item dialog, select Visual Web Part (Sandboxed), provide a name for the Web Part, and click Add.
Open the sandbox compatible Visual Web Part’s .ascx file and add some code to create the controls.
<br />
<asp:Label ID="Label2" runat="server" Text="Select a ski resort and click the button to see the best lift."></asp:Label>
<br /><br />
Resorts:
<asp:DropDownList ID="ResortDropDownList" runat="server">
<asp:ListItem>Breckenridge</asp:ListItem>
<asp:ListItem>Arapahoe Basin</asp:ListItem>
<asp:ListItem>Copper Mountain</asp:ListItem>
</asp:DropDownList>
<br /><br />
<asp:Button ID="Button1" runat="server" Text="Show best lift" OnClick="ResortDropDownList_Click" />
<br /><br />
<asp:Label ID="BestLiftLabel" runat="server" Text="Best lift:"></asp:Label>
<asp:Label ID="BestLiftValueLabel" runat="server"></asp:Label>
Open the sandbox compatible Visual Web Part’s .cs file and add an event handler for the dropdown list.
protected void ResortDropDownList_Click(object sender, EventArgs e)
{
switch (ResortDropDownList.SelectedValue)
{
case "Breckenridge":
BestLiftValueLabel.Text = "Falcon Chair";
break;
case "Arapahoe Basin":
BestLiftValueLabel.Text = "Palavicini";
break;
case "Copper Mountain":
BestLiftValueLabel.Text = "Storm King";
break;
}
}
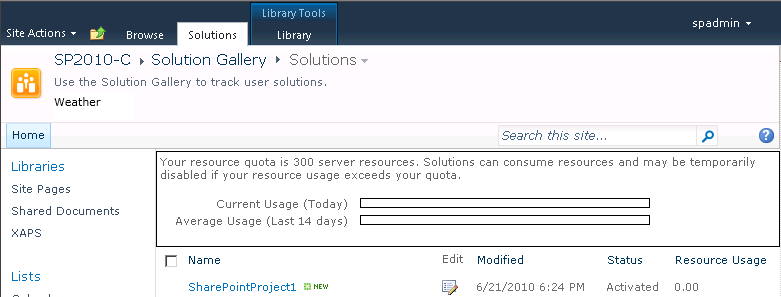
In the Solution Explorer, right click the project node and select Deploy. Notice the WSP is deployed to the Solutions Gallery where sandboxed solutions are deployed. (http://<server>/_catalogs/solutions/Forms/AllItems.aspx)
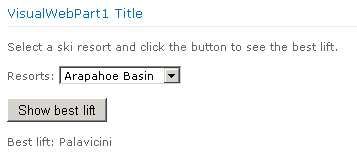
Add the sandbox compatible Visual Web Part to a SharePoint page and test it out.
Return to Visual Studio and try to add some code (to the sandbox compatible Visual Web Part) which is not permitted in the sandbox. In this example I added a SharePoint DateTimeControl control.
<SharePoint:DateTimeControl ID="DateTimeControl1" runat="server" />
Try to deploy the solution again and notice the error in the Error List which indicates the SharePoint DateTimeControl control is not permitted in the sandbox.
As you can see, you can find out before runtime if the code you are trying to run in the sandbox is permitted. This feature, coupled with the ability to use the visual designer to create sandbox compatible Visual Web Parts certainly saves development time. Thanks Mike and team!


