Working with the Outlook calendar in a PowerApp
November 7, 2017
HOW TO: Use a custom background color on the PowerApp loading screen
November 15, 2017
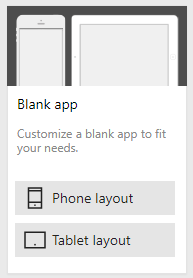
When you create a PowerApp, you must choose which layout to use. You can pick the Phone layout or the Tablet layout.
After you have created a PowerApp in one layout, many times you also want to create it in the other layout. Currently, there is no out of the box functionality that allows you to do this. PowerApps can take many hours to develop when they include a lot of functionality and integrations with other systems. You don’t want to recreate the entire PowerApp from scratch. So how can you do it without wasting time?
Here’s the magic recipe. In this example I have already created a mobile layout PowerApp and I convert it to a tablet layout.
- Export the mobile layout PowerApp.
- Create a new tablet layout PowerApp.
- Export the tablet layout PowerApp.
- Rename the .msapp files by adding the .zip extension.
- Extract the mobile export file to one directory.
- Extract the tablet export file to another directory.
- In the mobile export directory, open the properties.json file.
- In the tablet export directory, open the properties.json file.
- Enter a value in the Name element in the tablet properties.json file. This is the name of the PowerApp.
- Copy the LocalConnectionReferences element from the mobile to the tablet file.
- Copy the OriginatingVersion value from the mobile to the tablet file.

- Open the mobile export .zip file in an archive tool like WinRAR, WinZIP, etc.
- DRAG the tablet properties.json file into the mobile export .zip file to replace the properties.json file in the archive.
Note: You have to drag and drop the file into the archive, zipping the files in the directory will not work. - Close the archive tool.
- Remove the .zip extension from the mobile export file.
- Open PowerApps studio in the desktop or web browser.
- Click Open.
- Click Browse.
- Select the mobile export .msapp file.
- Click OK.
- Click App Settings.
- Click Screen size + orientation.
- In the Size radio button, select 3:2.
- Click Apply.
- Click Save.
- In the Size radio button, select 16:9.
- Click Apply.
- Click Save.
BOOM! Now you can start re-positioning all of your controls on the screen!
Here’s a video where I demonstrate how to do it.